Installing and Launching DevStation WSL Image on Windows 11
Introduction
When developing on Windows—especially when a Linux environment is required—developers have long faced a dilemma: either use heavy, resource-intensive traditional virtual machines, or endure the hassle of switching between dual operating systems. The emergence of the Windows Subsystem for Linux (WSL) has completely transformed this landscape. WSL is not merely a simple emulator or a bloated virtualization solution; it is a revolutionary compatibility layer deeply integrated into modern Windows systems. Compared to virtual machines, WSL offers game-changing advantages: near-native performance and near-instant startup speeds, enabling your development environment to be ready instantly; seamless integration between Windows and Linux, with file sharing, direct network connectivity, and unified command-line access, allowing you to harness tools from both ecosystems simultaneously; and significant system resource savings—so lightweight that it feels almost invisible. For these reasons, WSL has become the preferred gateway for countless developers, data scientists, and students to efficiently embrace the Linux ecosystem on Windows. This guide will walk you through installing and launching the DevStation WSL image on Windows 11. We provide two installation methods: Installing via Microsoft Store and Installing via ZIP package.
1. Installing via Microsoft Store: The DevStation WSL image is now available on the Microsoft Store and can be directly downloaded and installed. Steps: Download DevStation WSL → Launch Image → Enter Desktop Environment
2. Installing via ZIP Package: In addition to the Microsoft Store, the DevStation WSL image is also available on the openEuler official website. You can download the ZIP package from there. Steps: Get WSL ZIP Package → Register and Import Certificate → Launch Image → Enter Desktop Environment
Prerequisites
Before installing WSL, we need to prepare your Windows system to ensure the WSL image starts correctly after installation.
-
Your system must be Windows 11 (WSL is only supported on Windows 11).
-
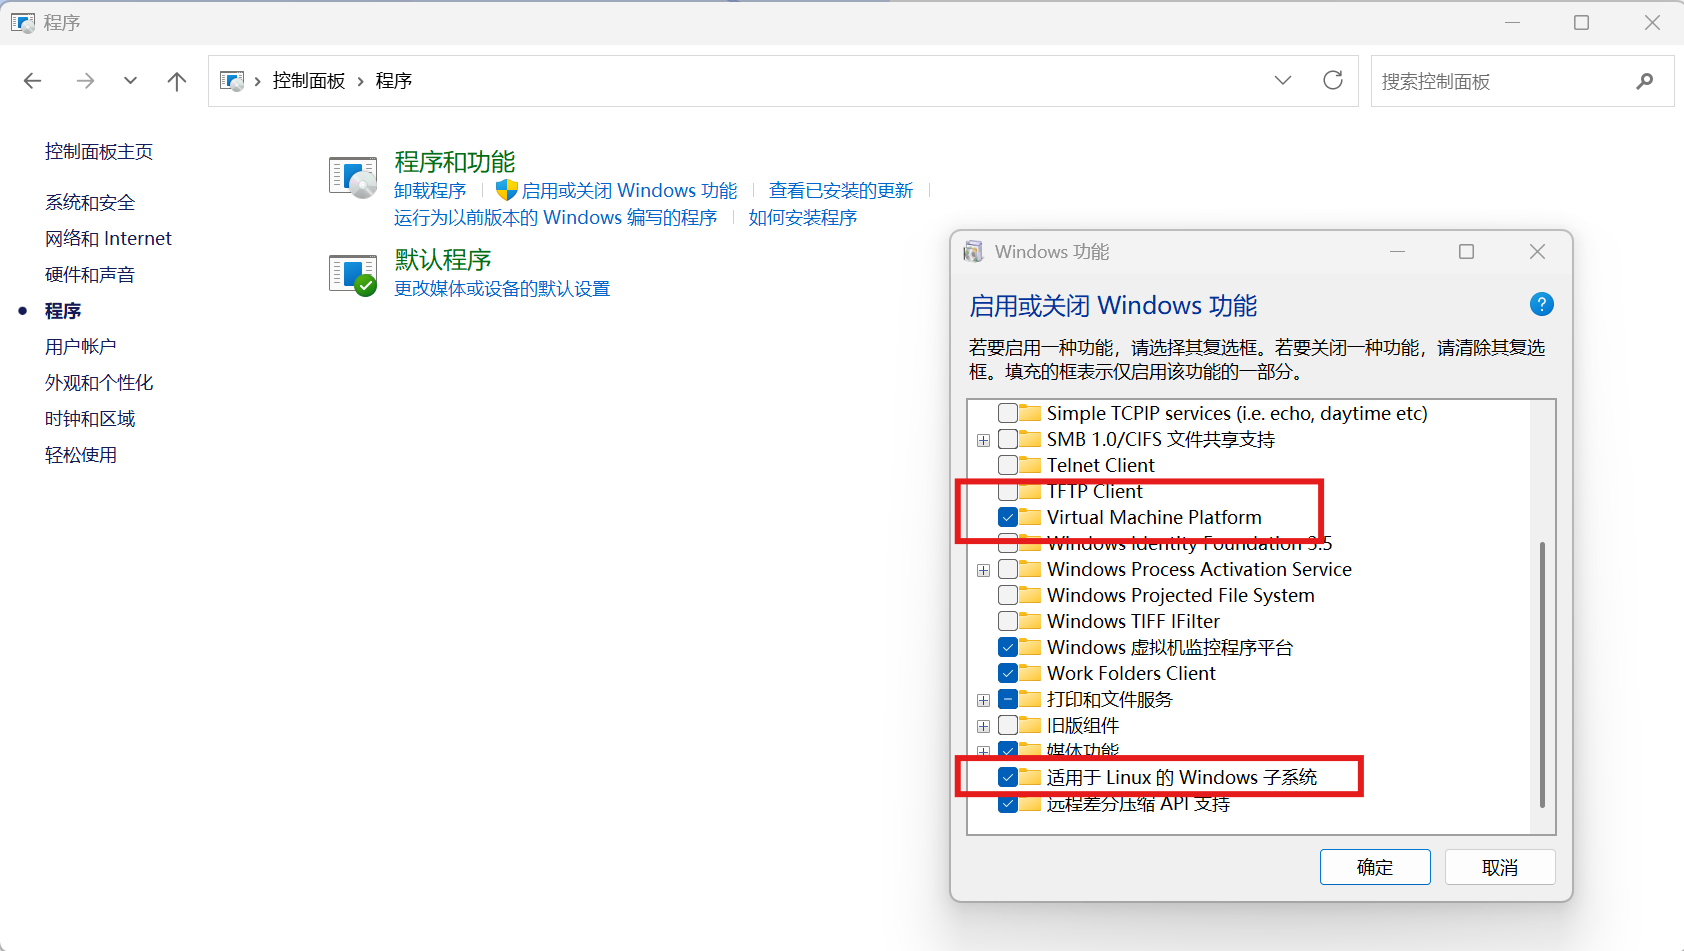
Enable two Windows features: Virtual Machine Platform (on some Windows 11 versions, this may appear as “Virtual Machine Platform” in English, as shown below) and Windows Subsystem for Linux. Restart your computer after enabling these options for them to take effect. (Settings path: Control Panel → Programs → Programs and Features → Turn Windows features on or off)
-
Update WSL to ensure you are using the latest kernel version. (Note: Ensure the two features above are enabled and the computer has been restarted before running this command—otherwise, the system may not recognize the
wslcommand.)
wsl --update
Installing via Microsoft Store
1. Download DevStation WSL
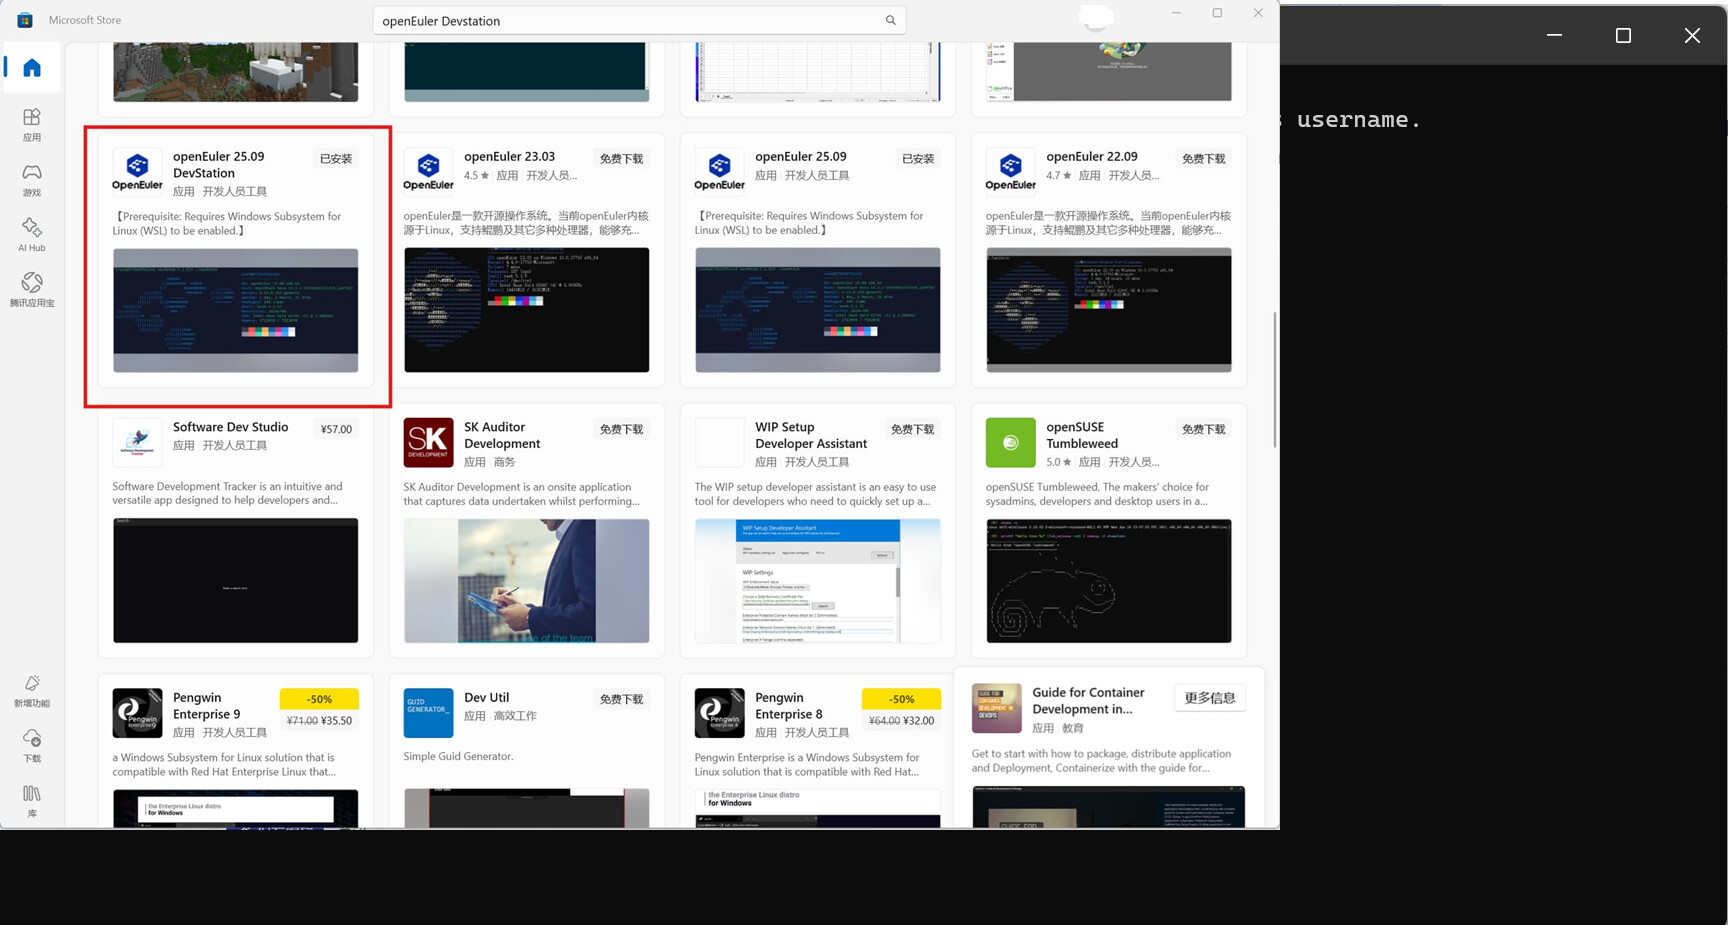
Open the Microsoft Store, search for openEuler DevStation, locate the app, and download it.
2. Launch the Image
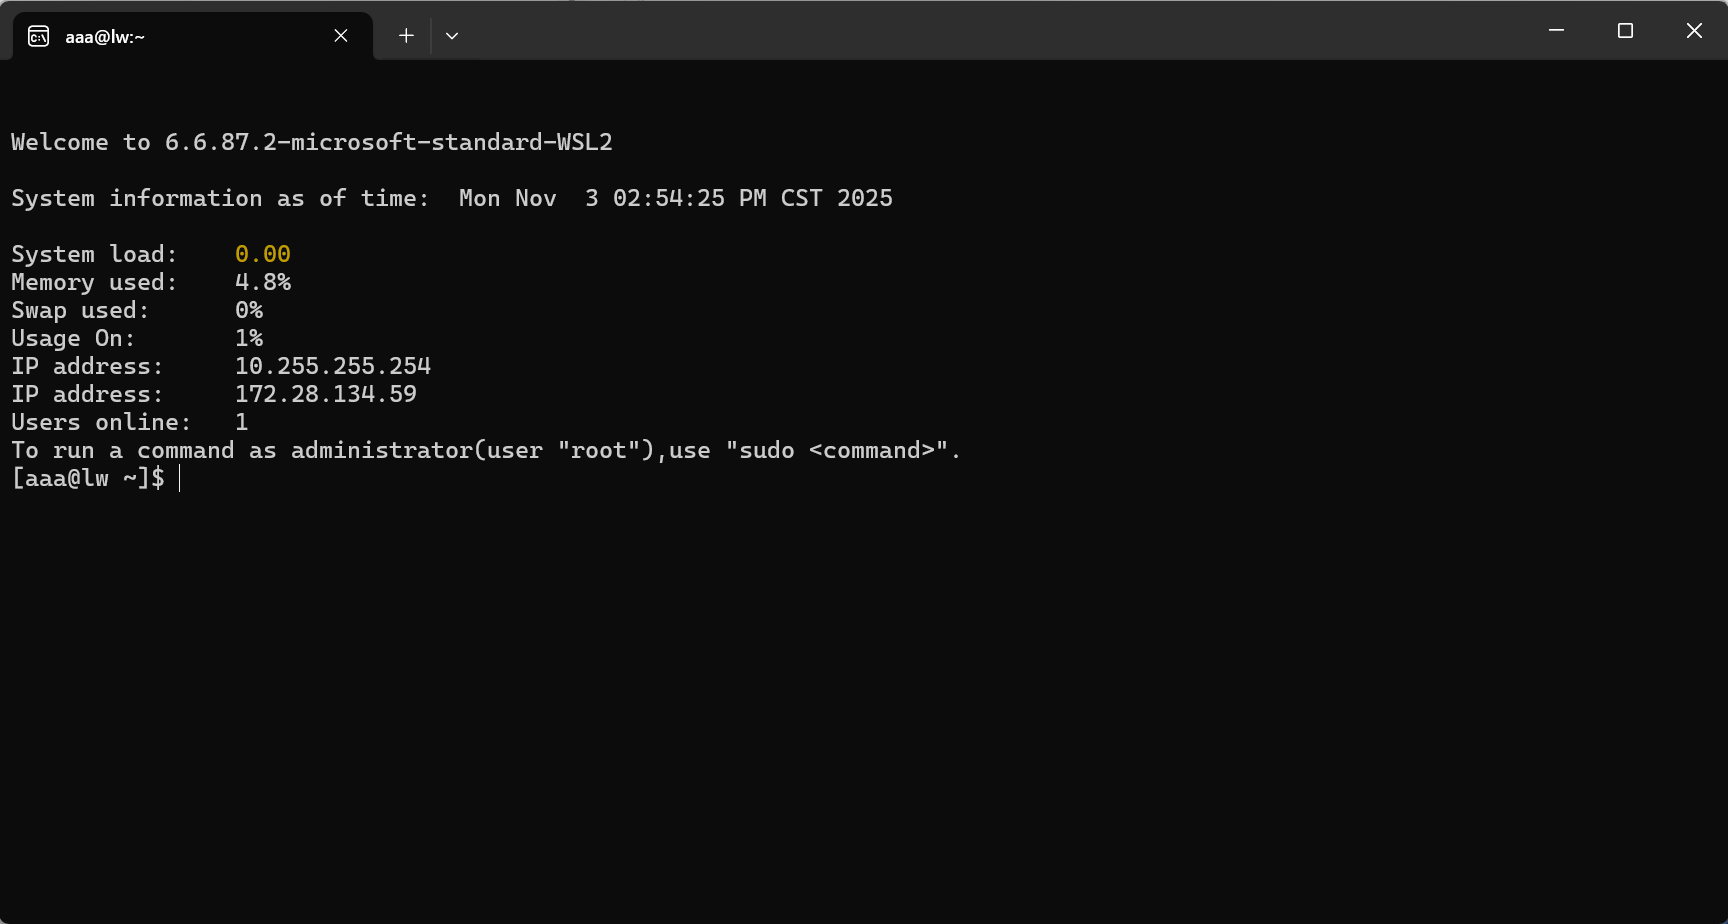
After installation, click to open the app (the first launch will trigger installation, taking about 1 minute). A Windows PowerShell window will open to start WSL. Follow the prompts to create a username and password, then you’ll gain access to the system.
3. Enter the Desktop Environment
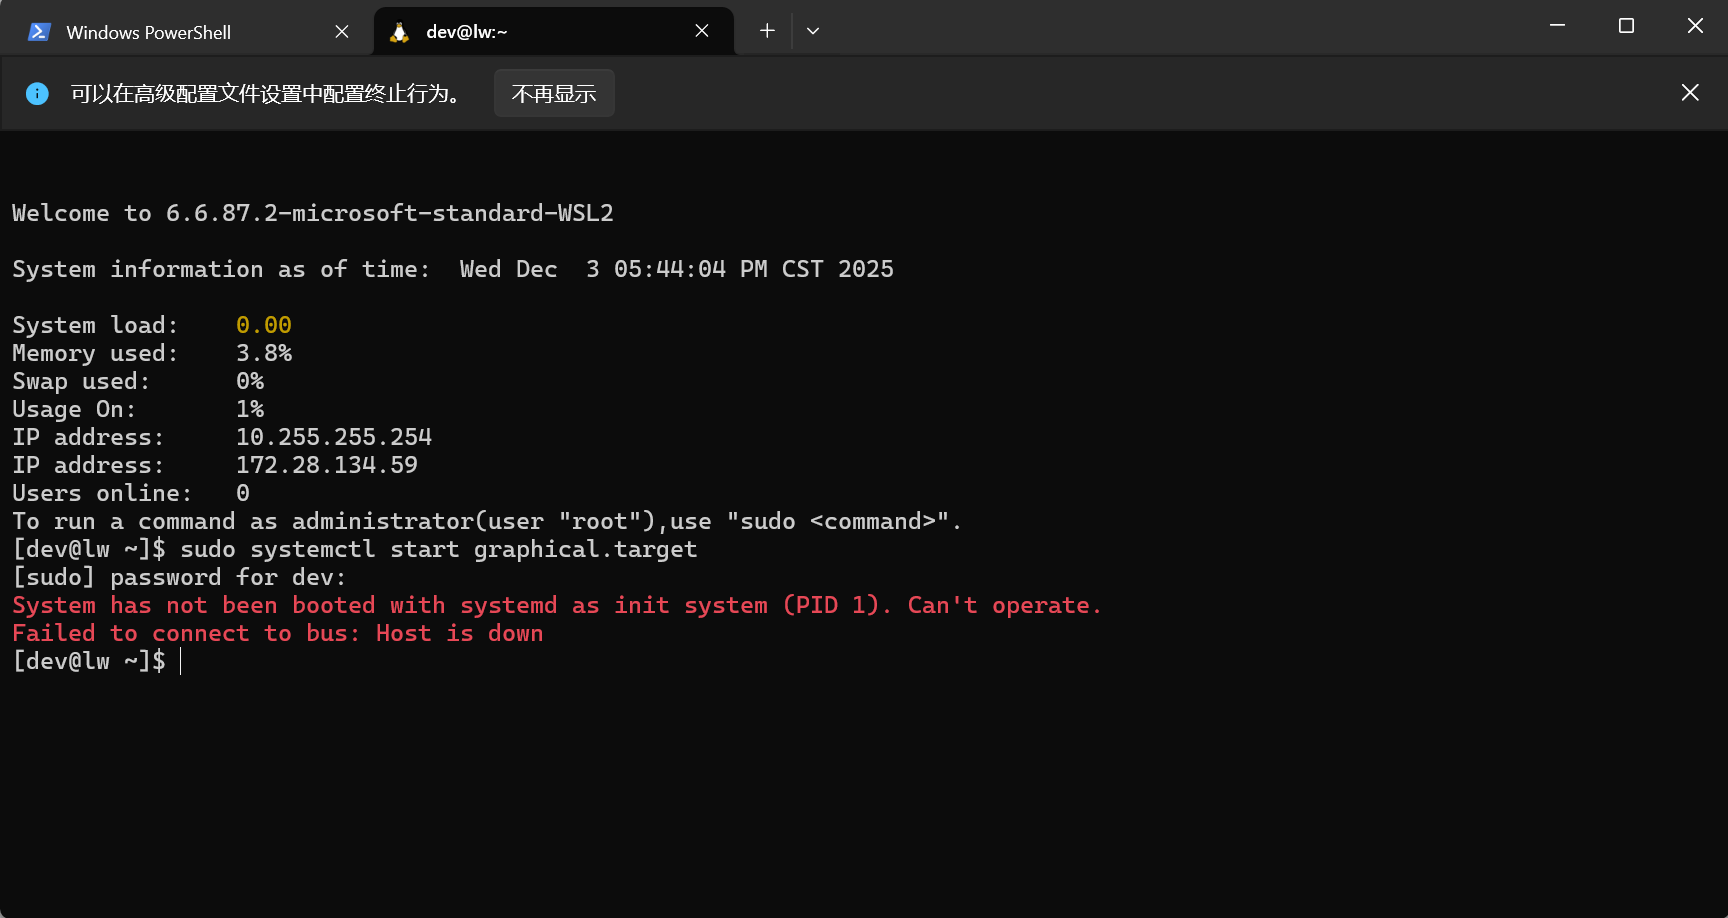
After logging in, the graphical environment starts automatically. Wait about 2 seconds, then enter the following command to start the desktop environment:
sudo systemctl start graphical.target
Installing via ZIP Package
1. Obtain the WSL ZIP Package
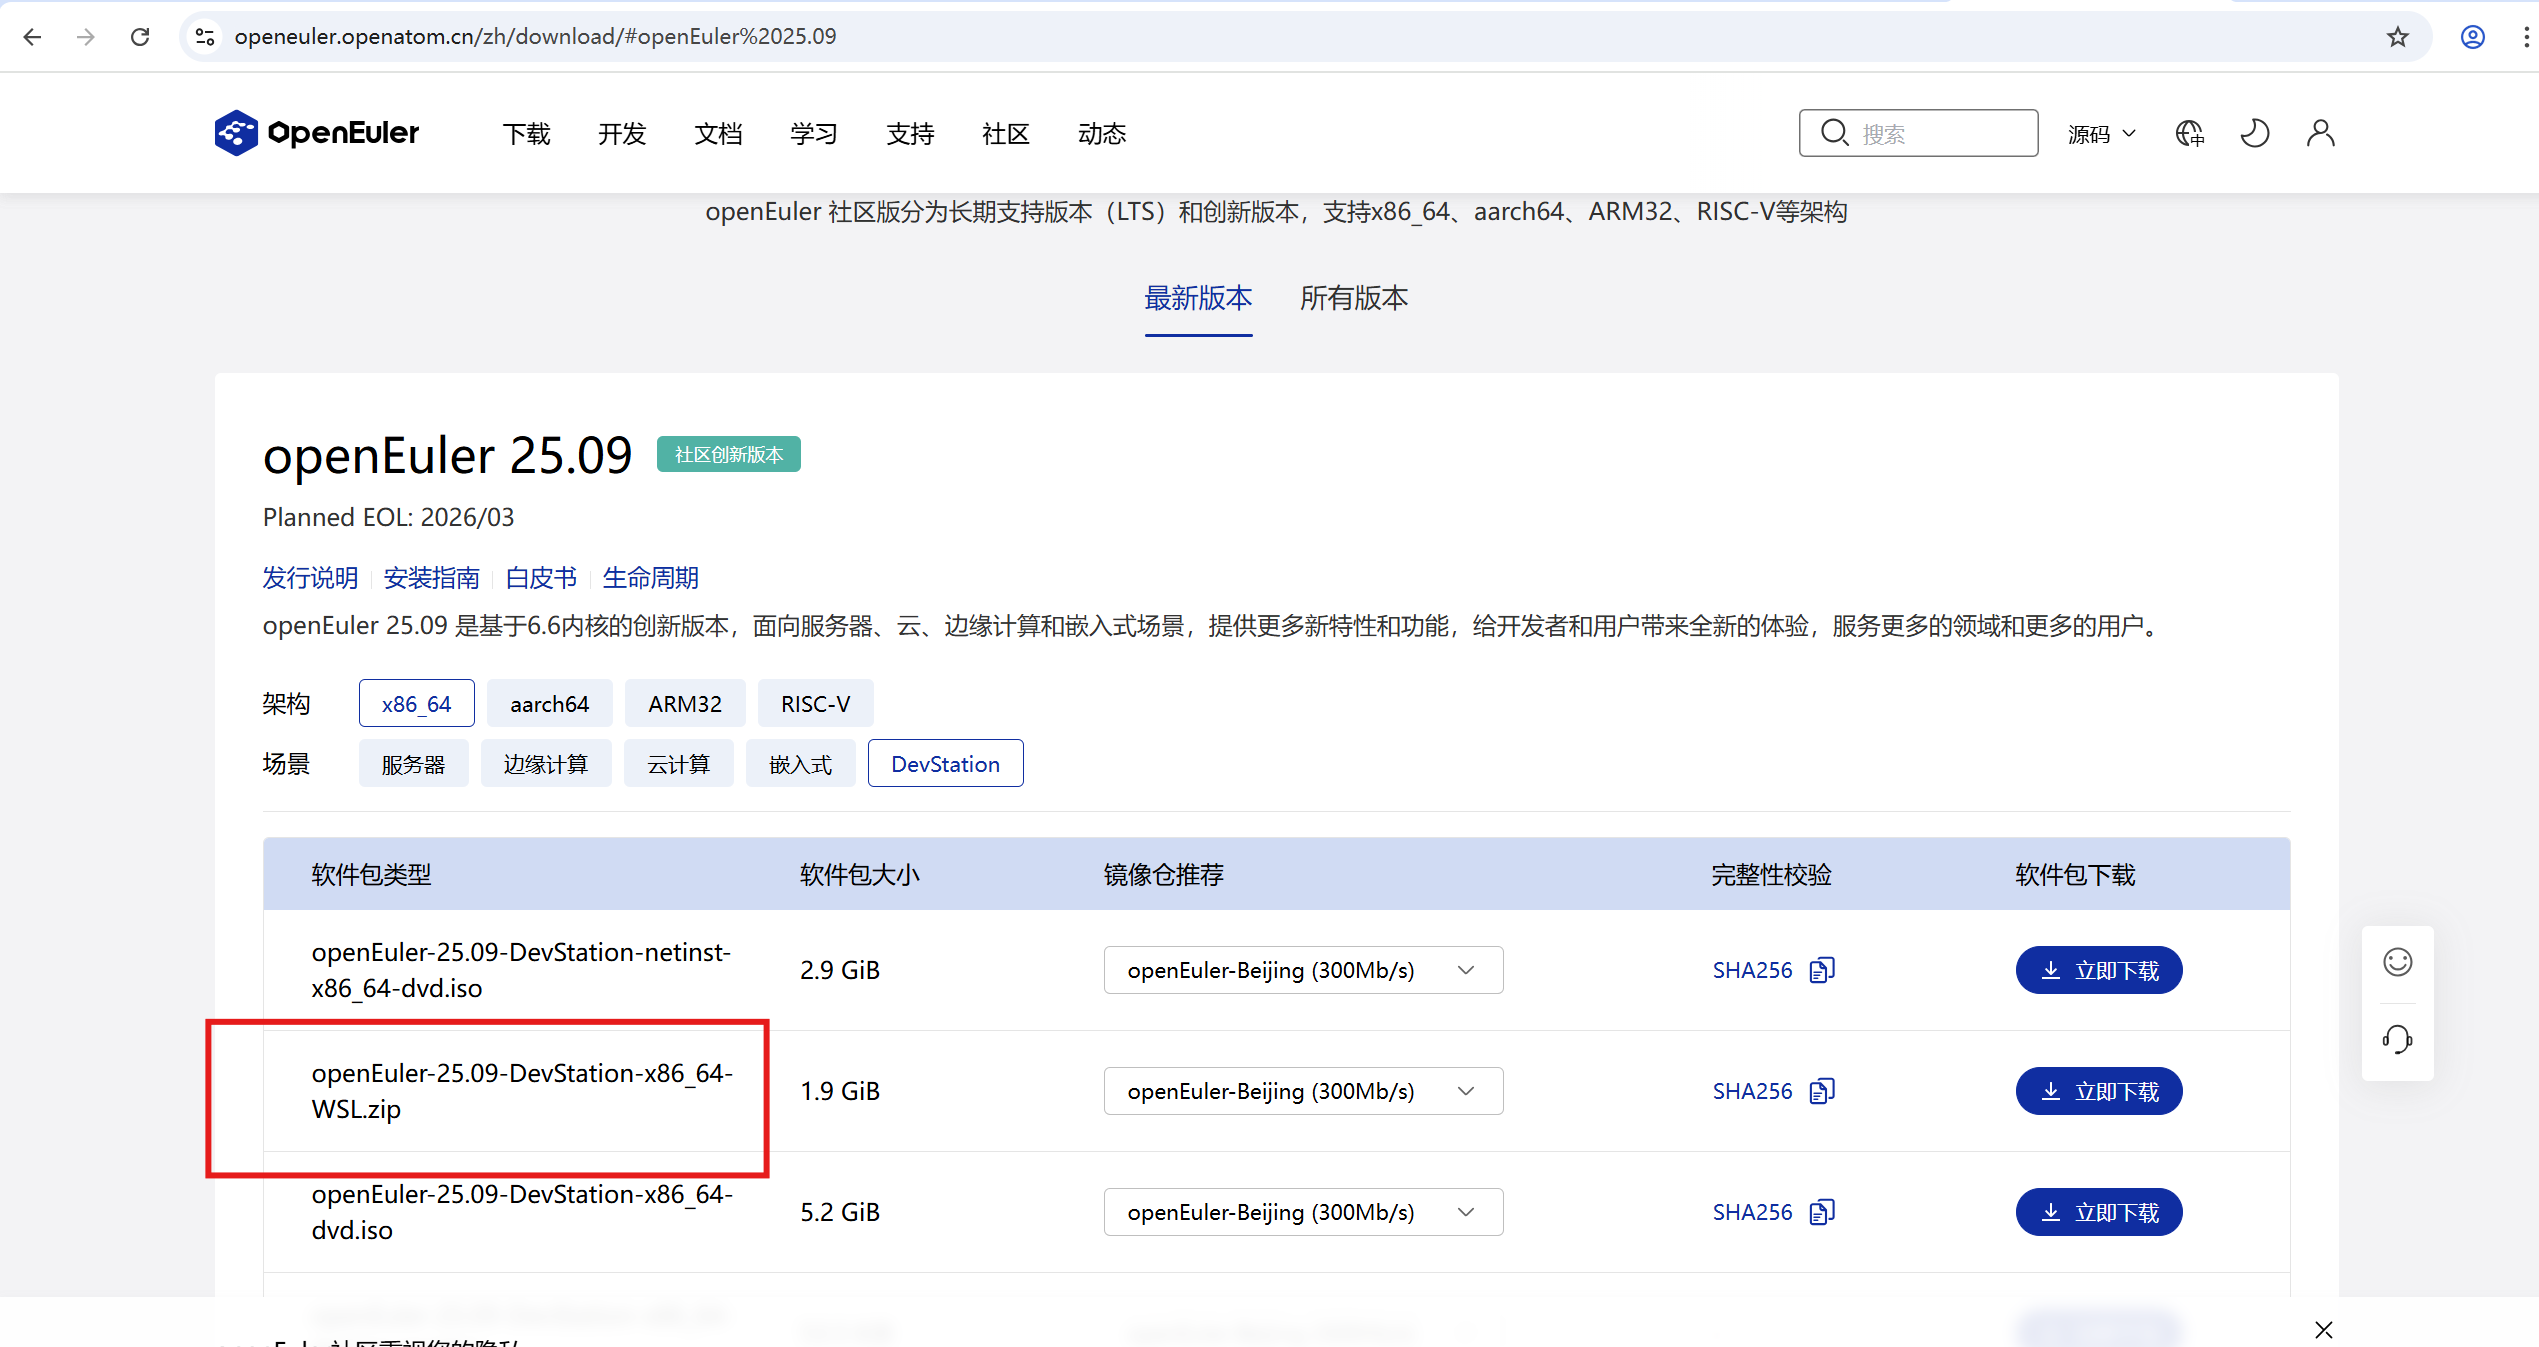
Visit the openEuler official website, go to the Download section, and select the appropriate WSL ZIP package for your system. Download it and extract the ZIP file to your local machine.
2. Register the Security Certificate
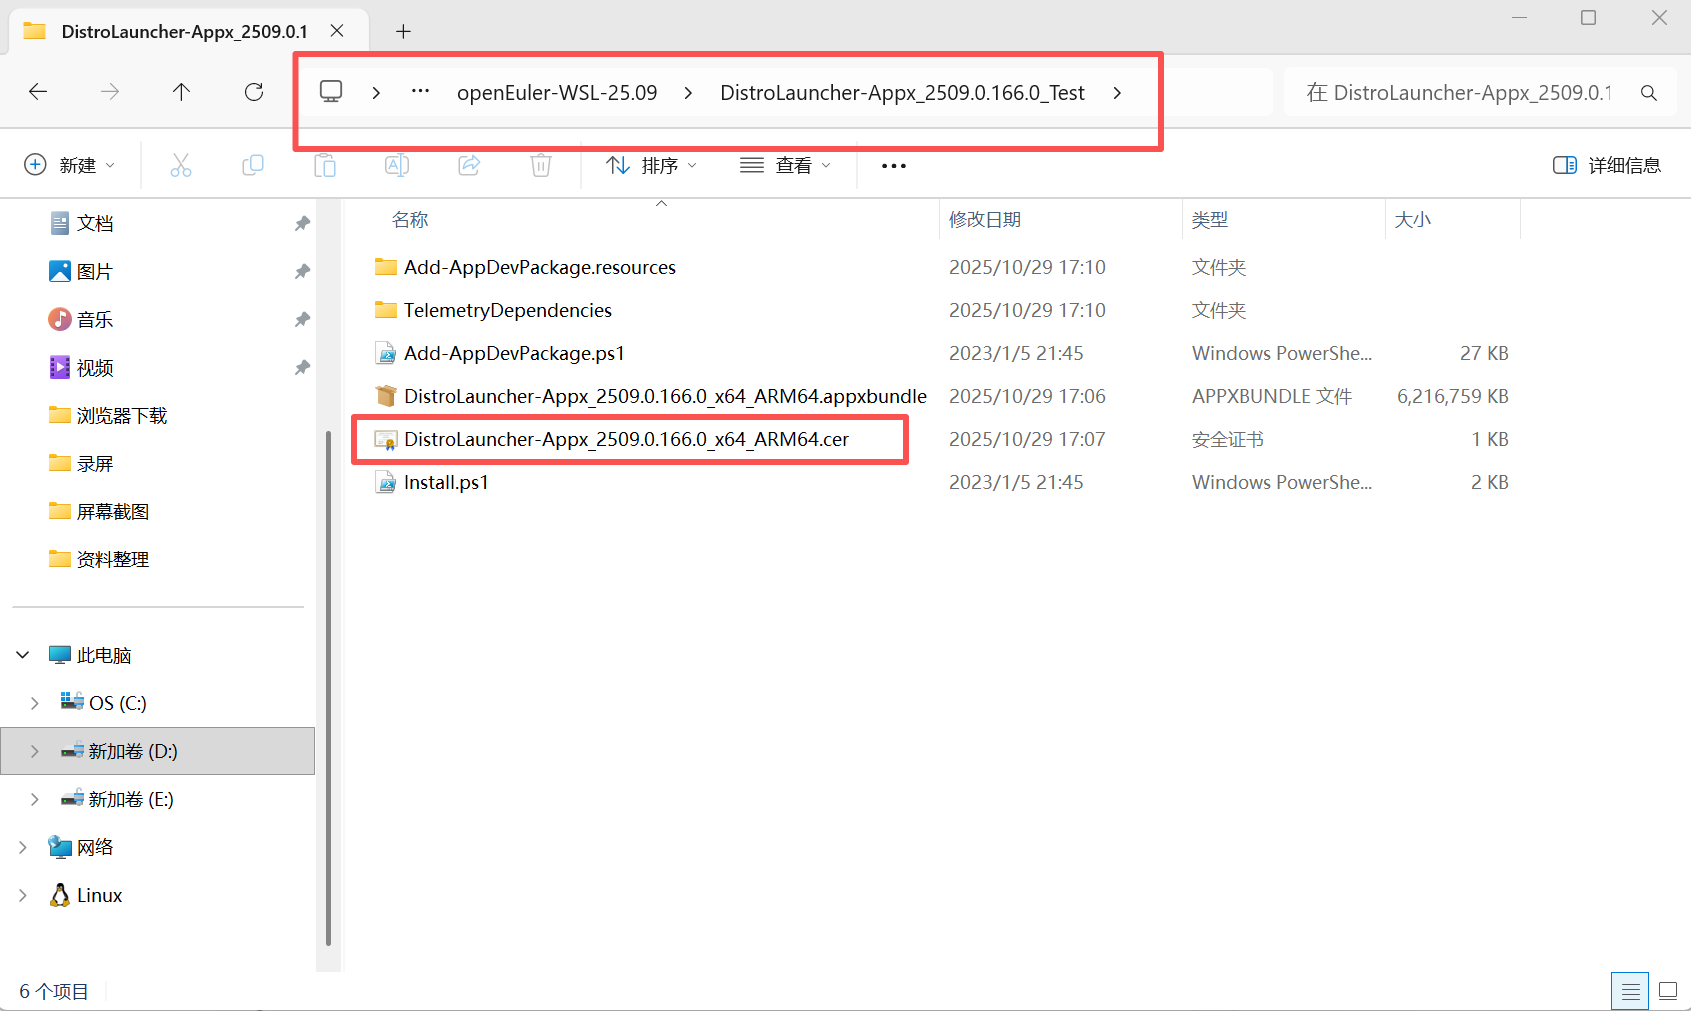
Navigate into the extracted folder and open the xxx_Test directory, as shown below.
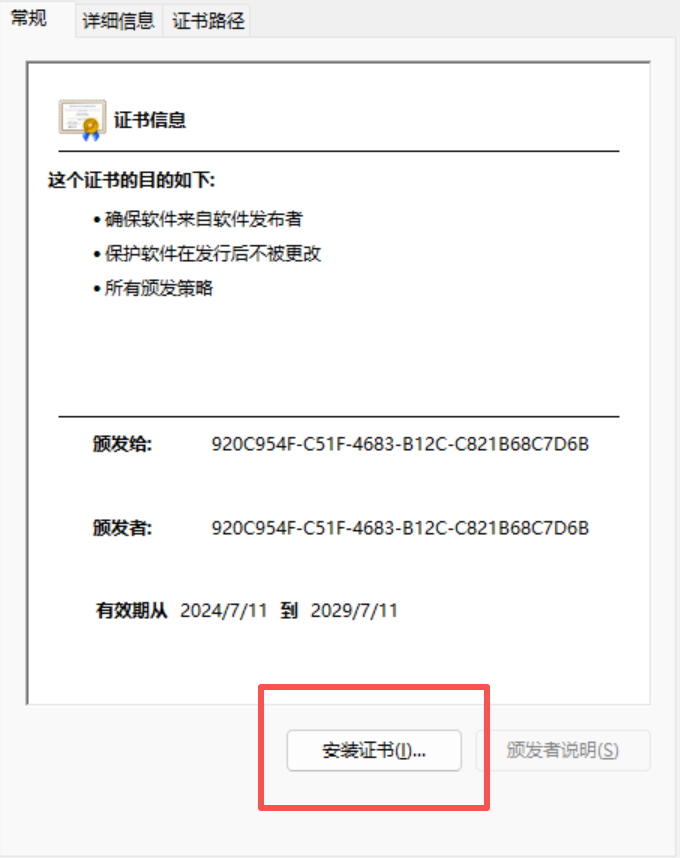
Double-click the .cer file in the image. Follow these steps:
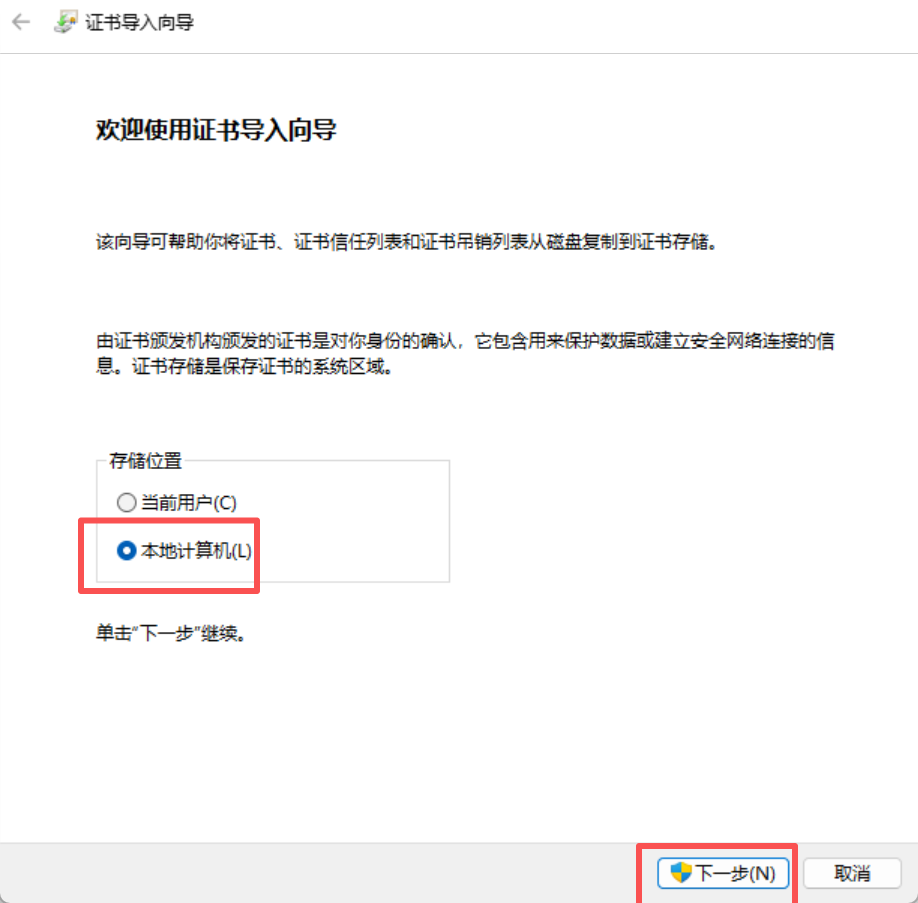
Install Certificate → Local Computer → Place all certificates in the following store (P) → Trusted People
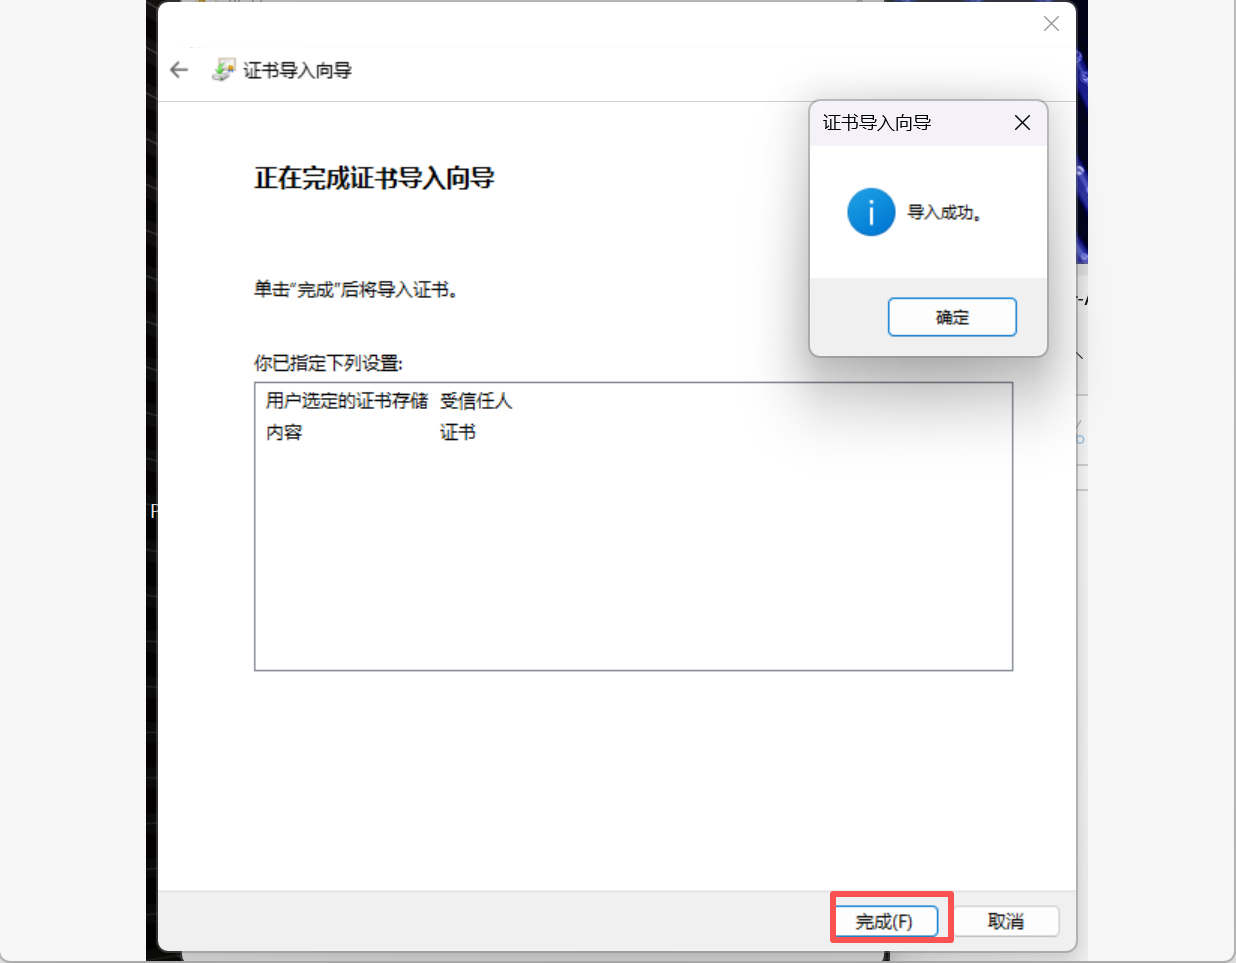
The process is shown below:
Click Finish to complete the certificate import.
3. Launch the Image
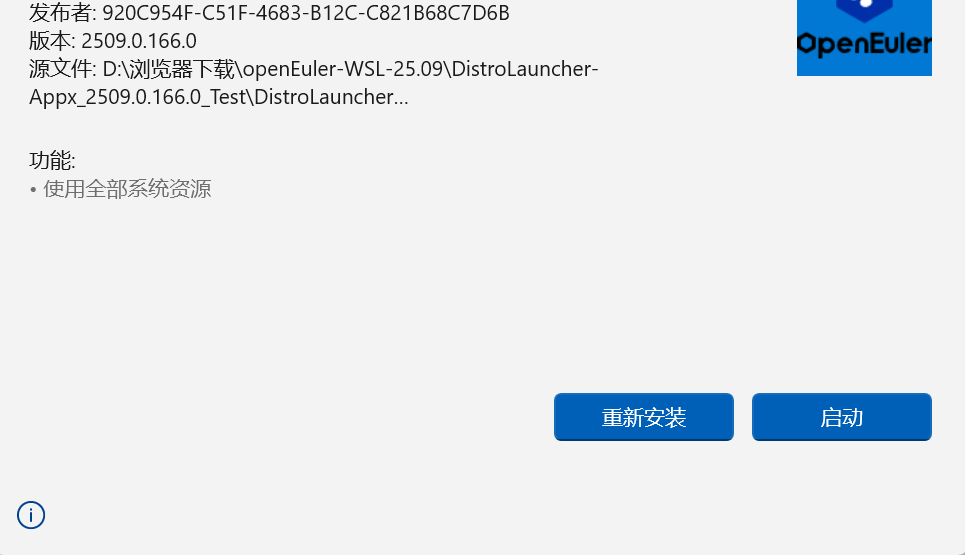
In the xxx_Test directory, double-click the .appxbundle file.
A pop-up window will appear. Click Install. (Note: Since the image is already installed on my machine, the options shown are “Reinstall” and “Launch”. Note: For future launches, simply double-click the .appxbundle file in the xxx_Test directory.)
Follow the prompts to create a username and password, then you’ll be logged into the system.
4. Enter the Desktop Environment
The steps to enter the desktop environment are identical to those used in the Microsoft Store installation method. Refer to the previous section for details.
Common Issues and Solutions
-
Error during installation:
WslRegisterDistribution failed with error: 0x8007019e; The Windows Subsystem for Linux optional component is not enabled. Please enable it and try again.
Solution: This error occurs because the Virtual Machine Platform and Windows Subsystem for Linux features are not enabled. Refer to the Prerequisites section (steps 2 and 3) to enable them and update WSL. -
Error during startup: “The Windows Subsystem for Linux must be updated to the latest version to continue. Run ‘wsl.exe --update’ to update.”
Solution: Run the commandwsl --updatein a PowerShell terminal to update the WSL kernel. -
Error when entering desktop environment:
System has not been booted with systemd as init system (PID 1). Can’t operate.
Failed to connect to bus: Host is down
Analysis: This is most likely due to thesystemdsetting in/etc/wsl.confbeing set tofalseunder the[boot]section, as shown below.
Solution: Change thesystemdvalue totrueusing the commandsudo vi /etc/wsl.conf(requires admin privileges). Save the file, then shut down WSL and restart it. (To shut down WSL: Open a new PowerShell window and runwsl --shutdown.) -
How to close an open WSL instance?
Method: Use the keyboard shortcut Alt + Tab to switch between windows. In the open PowerShell window, typeexitand press Enter, or simply close the PowerShell window. The WSL instance will fully shut down within a few seconds.