前言
想让 AI Agent 常驻服务器全天待命,替你盯着代码仓库、跑定时任务、随时处理突发任务,却卡在两道坎上:
- 环境难装:Node.js 版本、依赖冲突、系统兼容性,折腾半天跑不起来。
- 用起来不顺手:Agent 部署在远端服务器,缺乏便捷的通讯渠道,想发条指令还要先开 SSH,谈不上"随时随地"。
OpenClaw x openEuler 针对这两个痛点给出了完整解法:
- 部署侧:提供基于 openEuler 24.03-LTS-SP3 的容器镜像(版本 2026.3.2),一条
docker pull拉起即用,容器在服务器上 24 小时持续运行,不依赖本机环境,重启自动恢复。 - 使用侧:官方飞书插件已正式上线,配置完成后飞书即成为你与服务器 Agent 之间的实时通道——无论通勤途中还是会议间隙,发一条消息,Agent 即时收到、立即执行,结果直接回到对话框,全程无需登录服务器。
跑通之后,你得到的是一个 24 小时在线、随时随地可控、能力按需扩展的个人 AI Agent。本教程将带你在 openEuler 服务器上完成从容器部署到飞书接入的完整配置,全程不超过 30 分钟。
使用 Docker 容器快速部署 OpenClaw
0. 环境准备
本教程所有步骤均依赖 Docker,请根据操作系统完成安装:
| 操作系统 | 安装方式 |
|---|---|
| openEuler / Linux | sudo yum install docker 或参考发行版文档安装 Docker Engine |
| macOS | 下载安装 Docker Desktop for Mac |
| Windows | 下载安装 Docker Desktop for Windows |
macOS 注意事项
Docker Desktop for Mac 安装完成后,每次使用前需先启动 Docker Desktop 应用,等待菜单栏鲸鱼图标状态变为 “Running” 后,再在 Terminal 中执行后续命令。
Windows 注意事项
同样需要先启动 Docker Desktop,等待系统托盘图标状态变为 “Running”。
TODO:WSL 部署方式稍后补充。
安装完成后验证 Docker 是否就绪:
docker version
1. 拉取镜像
docker pull openeuler/openclaw:2026.3.2-oe2403sp3
2. 运行 Onboarding 向导
docker run -it --name my-openclaw openeuler/openclaw:2026.3.2-oe2403ltssp3 onboard --install-daemon
向导启动后,按提示完成以下配置:
2.1 配置模式
选择 QuickStart(推荐),向导将引导完成核心配置。

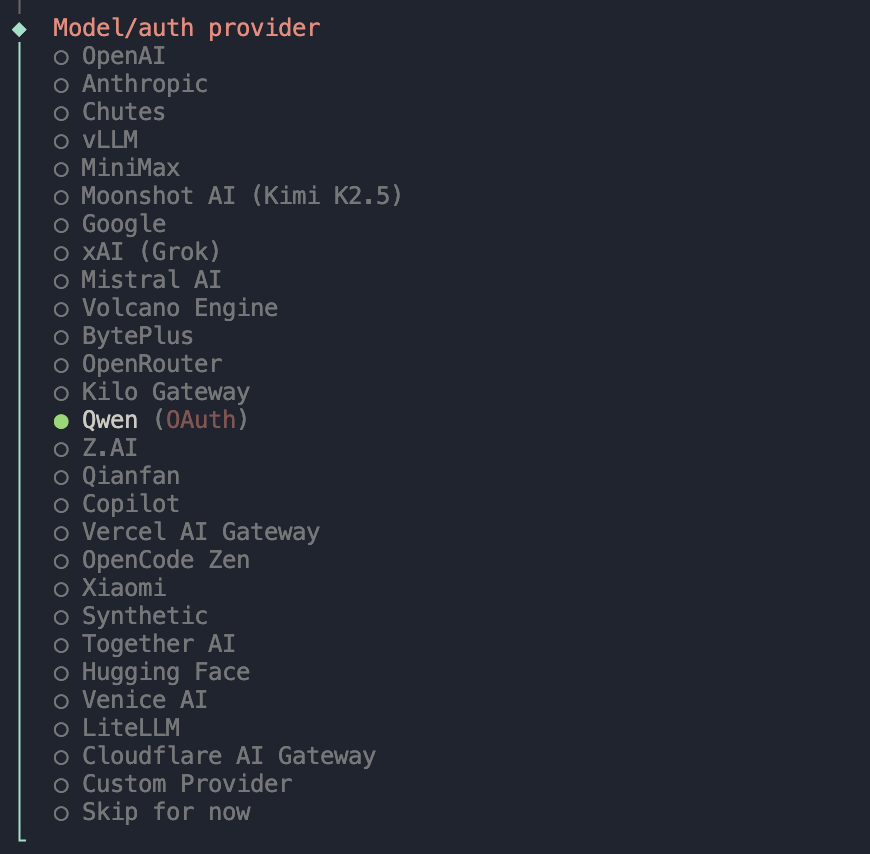
2.2 配置模型
OpenClaw 支持各大 LLM 公司的模型,也支持本地模型。以 Qwen(OAuth) 为例进行配置。
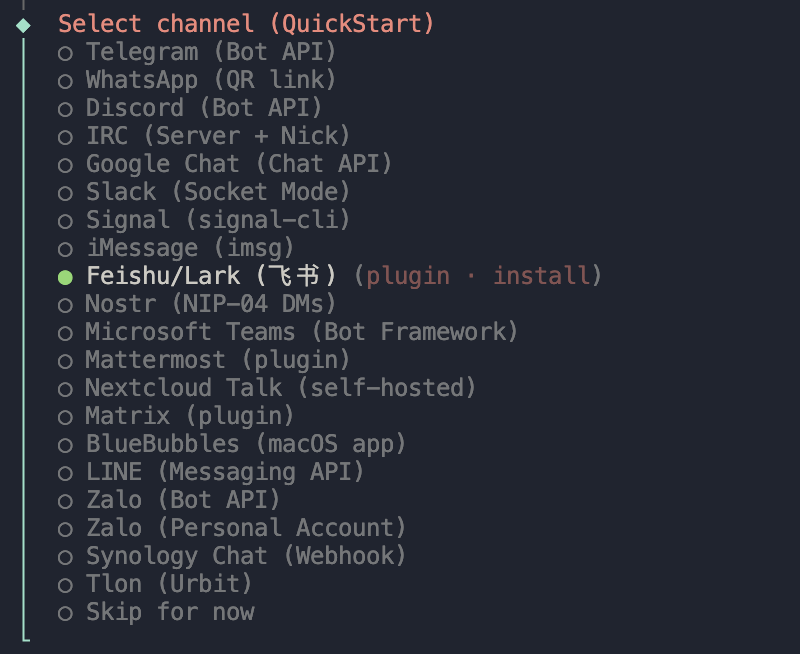
2.3 频道配置
频道选项中海外平台居多,国内用户推荐选择 Feishu/Lark(飞书),或直接跳过,飞书完整配置流程见第二章。
2.4 Skills 配置
向导会逐一询问各 Skill 所需的 API Key(如下图所示),不需要的直接选 No 跳过,后续对话中也可随时通过 /install 补充安装。

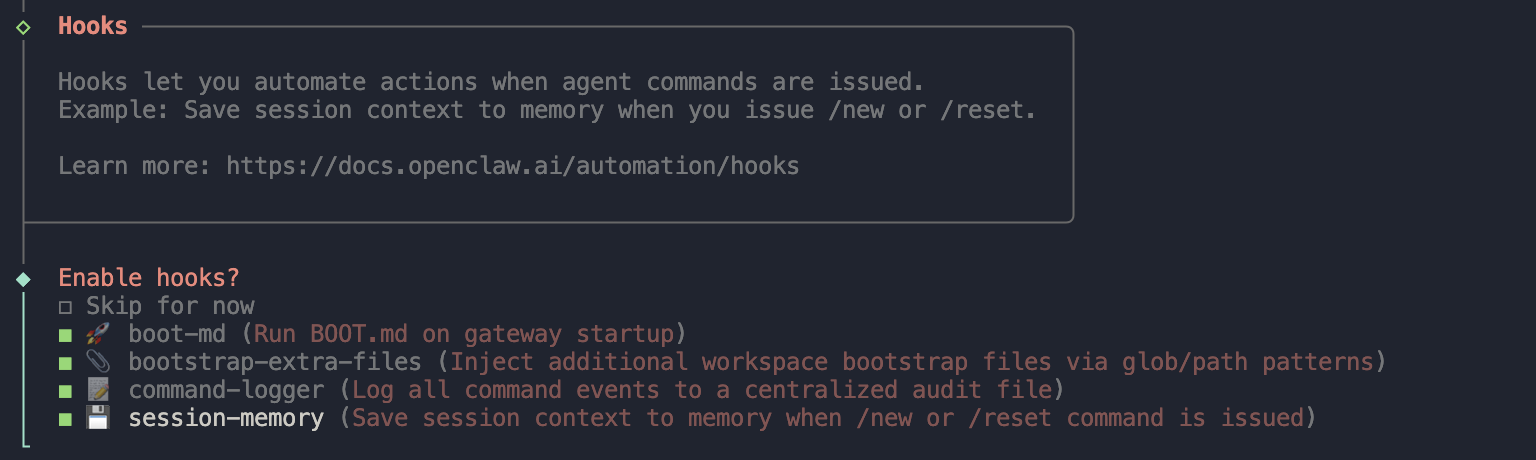
2.5 Hooks 配置
官方推荐的 4 条 hooks 建议全部启用:
-
boot-md:启动时自动加载指定 Markdown 文本作为默认引导内容,常用于把规则、偏好、项目背景等在每次启动时注入。
-
bootstrap-extra-files:通过 glob/path 模式注入额外的工作区引导文件。
-
command-logger:把在 OpenClaw 里执行过的命令和关键操作记一份日志,方便排查问题和复盘。
-
session-memory:在执行
/new或/reset命令时保存会话上下文,让下次启动能延续上下文,体验更连贯。
3. 启动容器
Onboarding 完成后,启动容器:
docker start my-openclaw
4. 运行 Gateway(终端 1)
Gateway 是 OpenClaw 的核心服务进程,负责连接模型、频道和 Skills,必须保持运行。
docker exec -it my-openclaw openclaw gateway run
5. 启动 TUI 客户端(终端 2)
打开新终端,进入 TUI 交互界面:
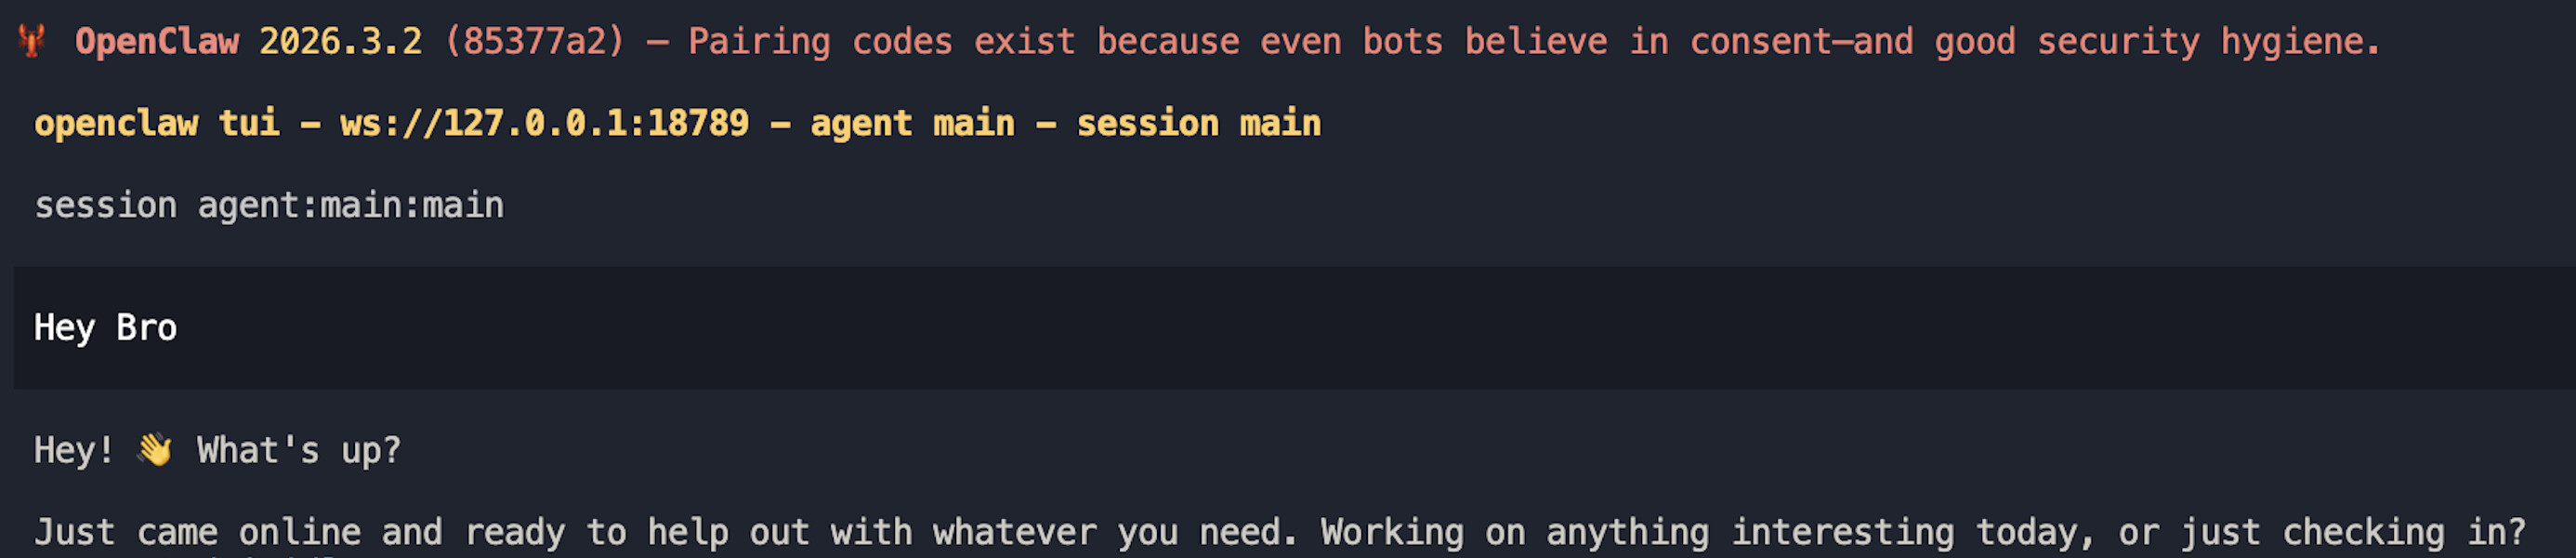
docker exec -it my-openclaw openclaw tui
TUI 启动后即可开始与 OpenClaw 对话:
至此,OpenClaw 已在容器中完整运行。后续如需调整模型和频道配置,可在容器内执行:
docker exec -it my-openclaw openclaw configure
二、配置飞书频道
OpenClaw 支持通过飞书官方插件与飞书机器人打通,国内用户推荐使用此方式。以下步骤需要在 OpenClaw 容器已运行的前提下完成。
第一步:创建飞书企业自建应用
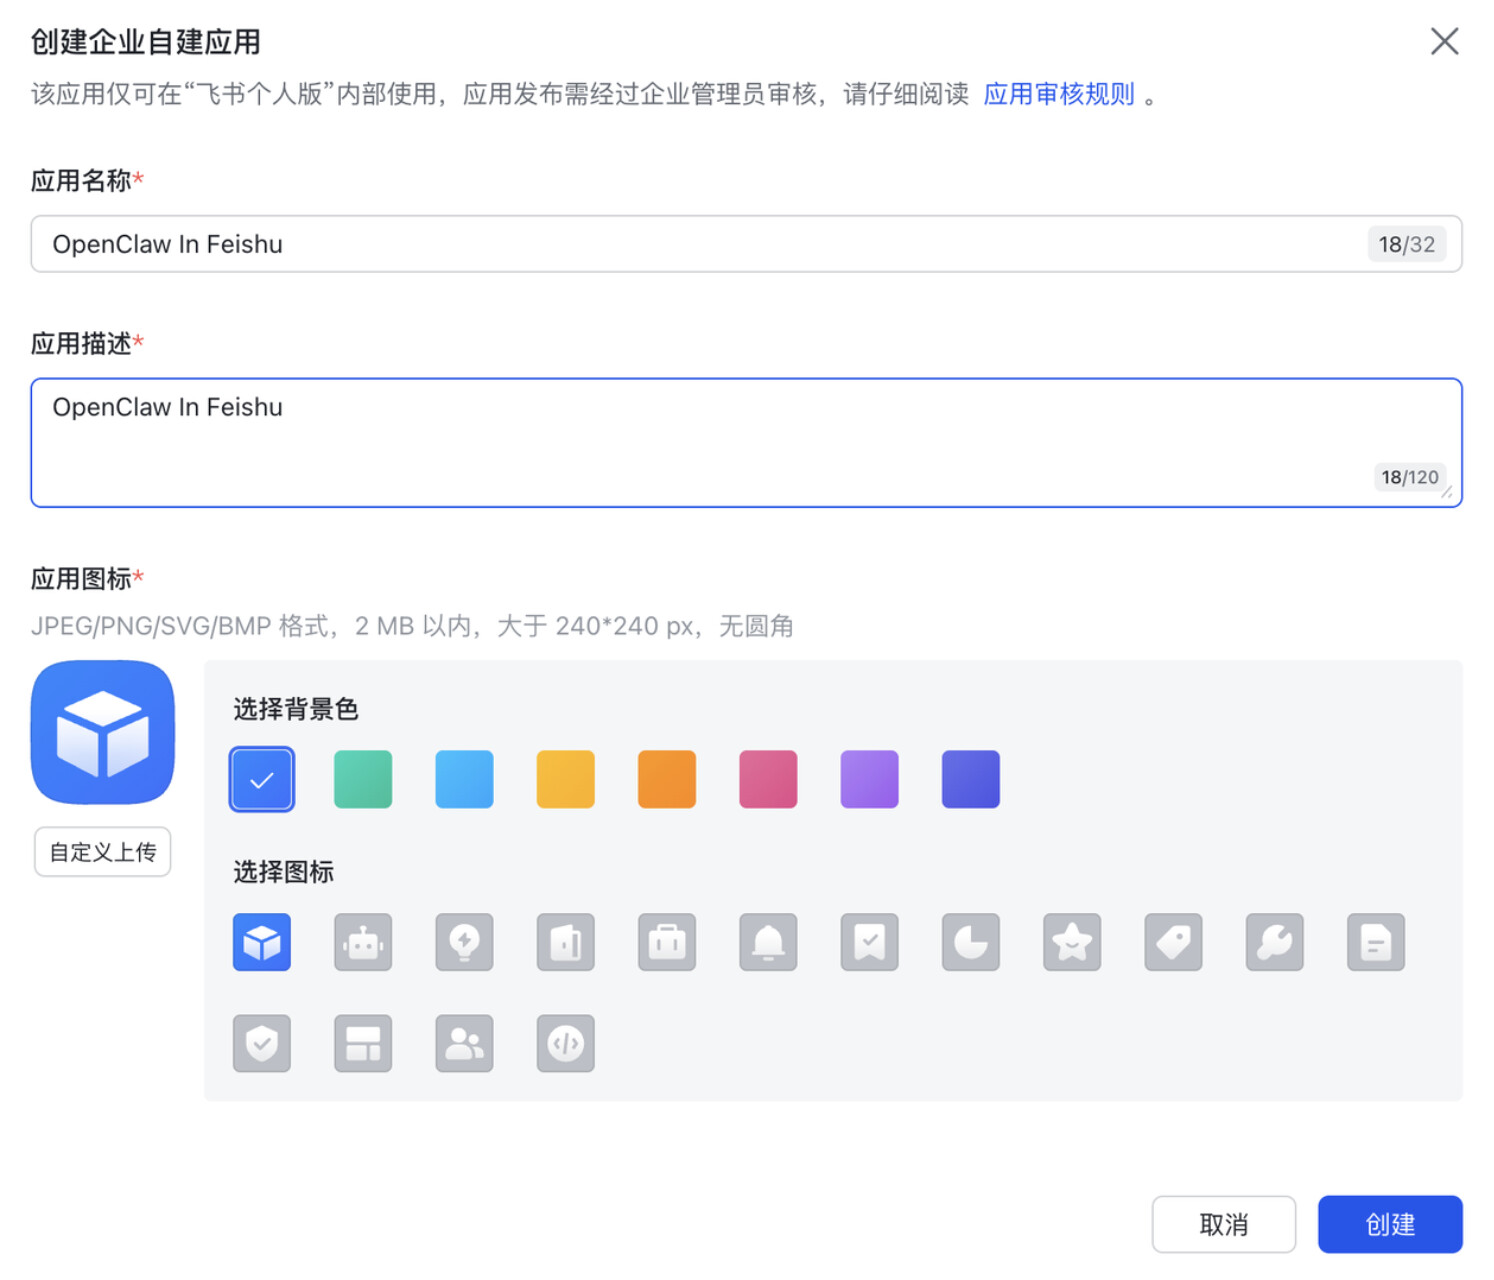
登录飞书开放平台,点击"创建企业自建应用"。

在弹窗中填写应用名称、描述和图标,点击"创建"按钮。
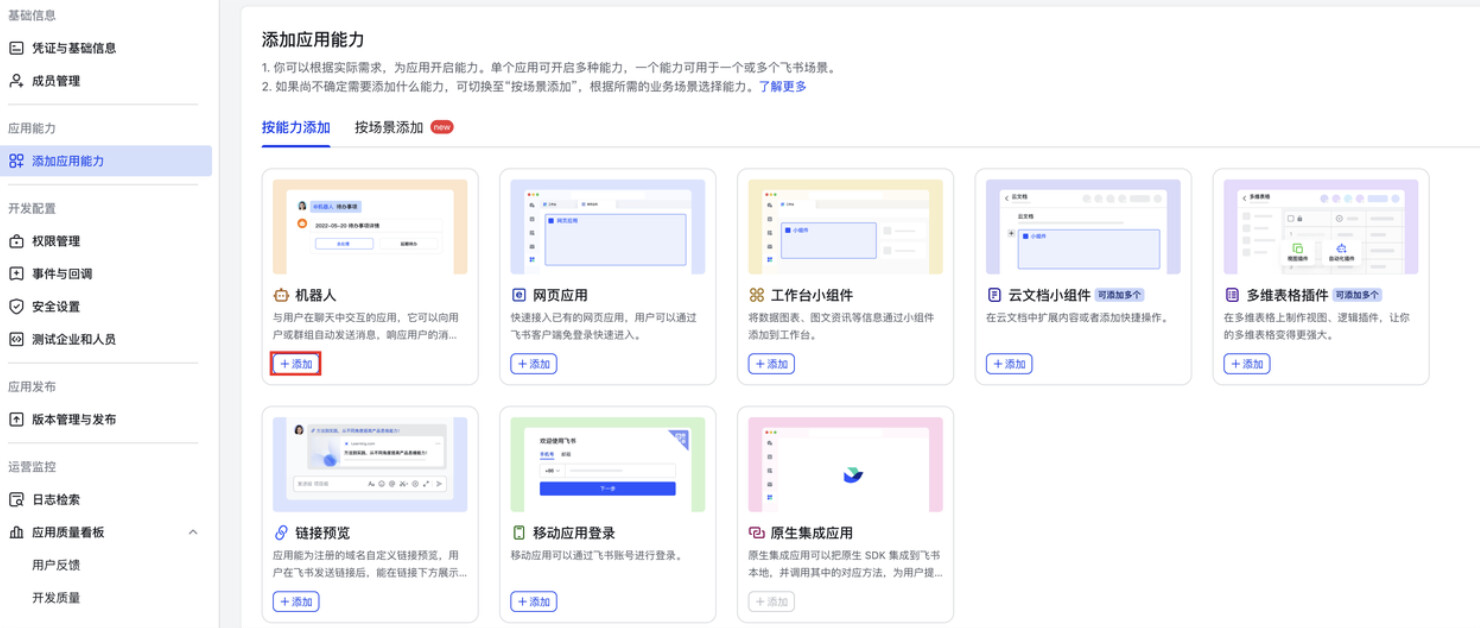
在左侧目录树选择"应用能力 > 添加应用能力",选择"按能力添加"页签,点击"机器人"能力卡片的"添加"按钮。
第二步:配置权限
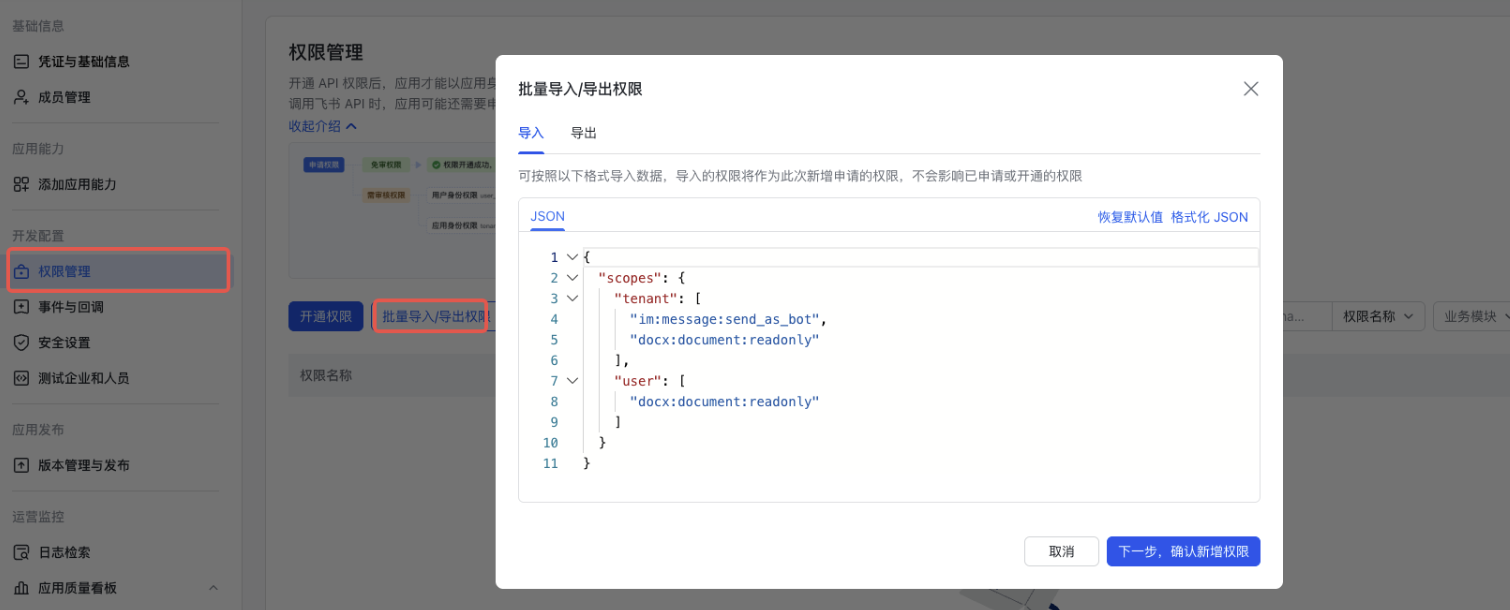
在左侧目录树选择"开发配置 > 权限管理",点击"批量导入/导出权限"按钮,在"导入"页签中将以下 JSON 替换原有示例,点击"下一步,确认新增权限"。
{
  "scopes": {
    "tenant": [
      "contact:contact.base:readonly",
      "docx:document:readonly",
      "im:chat:read",
      "im:chat:update",
      "im:message.group_at_msg:readonly",
      "im:message.p2p_msg:readonly",
      "im:message.pins:read",
      "im:message.pins:write_only",
      "im:message.reactions:read",
      "im:message.reactions:write_only",
      "im:message:readonly",
      "im:message:recall",
      "im:message:send_as_bot",
      "im:message:send_multi_users",
      "im:message:send_sys_msg",
      "im:message:update",
      "im:resource",
      "application:application:self_manage",
      "cardkit:card:write",
      "cardkit:card:read"
    ],
    "user": [
      "contact:user.employee_id:readonly",
      "offline_access",
      "base:app:copy",
      "base:field:create",
      "base:field:delete",
      "base:field:read",
      "base:field:update",
      "base:record:create",
      "base:record:delete",
      "base:record:retrieve",
      "base:record:update",
      "base:table:create",
      "base:table:delete",
      "base:table:read",
      "base:table:update",
      "base:view:read",
      "base:view:write_only",
      "base:app:create",
      "base:app:update",
      "base:app:read",
      "board:whiteboard:node:create",
      "board:whiteboard:node:read",
      "calendar:calendar:read",
      "calendar:calendar.event:create",
      "calendar:calendar.event:delete",
      "calendar:calendar.event:read",
      "calendar:calendar.event:reply",
      "calendar:calendar.event:update",
      "calendar:calendar.free_busy:read",
      "contact:contact.base:readonly",
      "contact:user.base:readonly",
      "contact:user:search",
      "docs:document.comment:create",
      "docs:document.comment:read",
      "docs:document.comment:update",
      "docs:document.media:download",
      "docs:document:copy",
      "docx:document:create",
      "docx:document:readonly",
      "docx:document:write_only",
      "drive:drive.metadata:readonly",
      "drive:file:download",
      "drive:file:upload",
      "im:chat.members:read",
      "im:chat:read",
      "im:message",
      "im:message.group_msg:get_as_user",
      "im:message.p2p_msg:get_as_user",
      "im:message.send_as_user",
      "im:message:readonly",
      "search:docs:read",
      "search:message",
      "space:document:delete",
      "space:document:move",
      "space:document:retrieve",
      "task:comment:read",
      "task:comment:write",
      "task:task:read",
      "task:task:write",
      "task:task:writeonly",
      "task:tasklist:read",
      "task:tasklist:write",
      "wiki:node:copy",
      "wiki:node:create",
      "wiki:node:move",
      "wiki:node:read",
      "wiki:node:retrieve",
      "wiki:space:read",
      "wiki:space:retrieve",
      "wiki:space:write_only"
    ]
  }
}
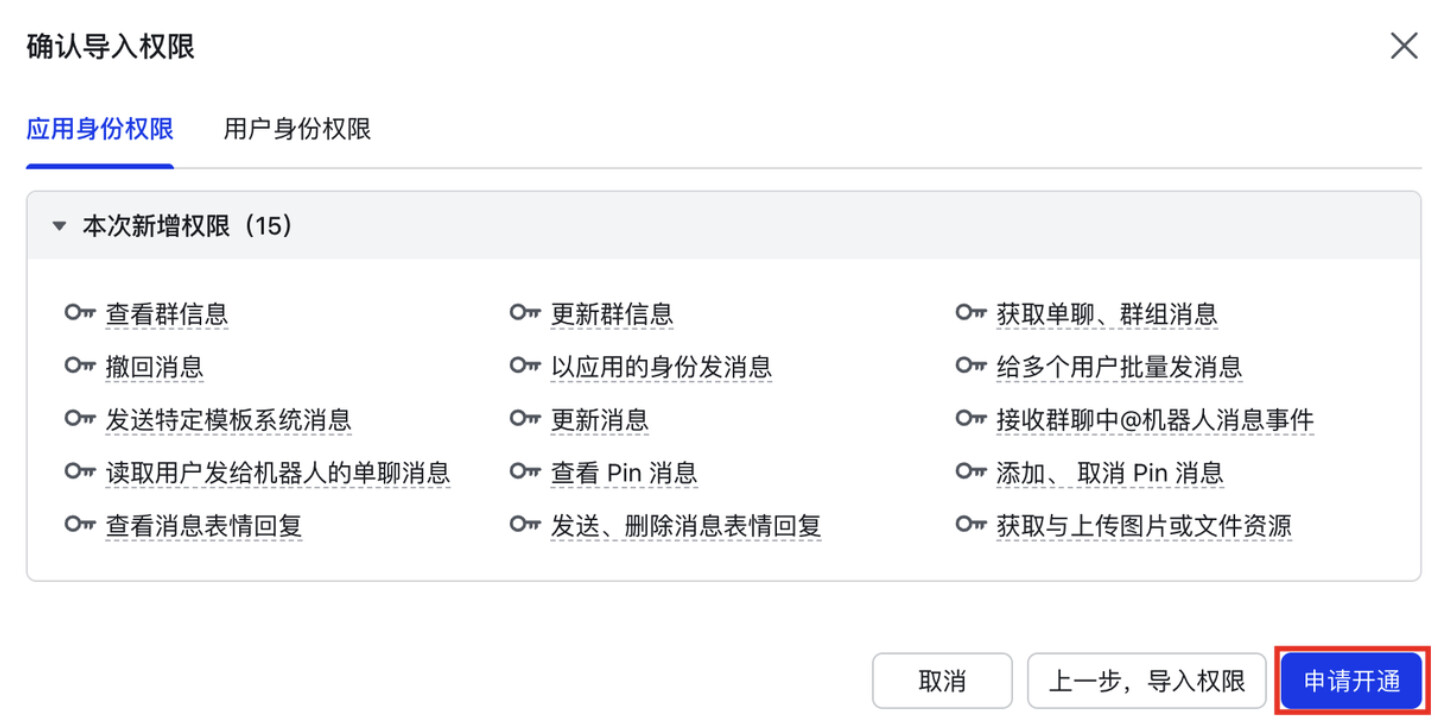
确认权限列表无误后,点击"申请开通"按钮。
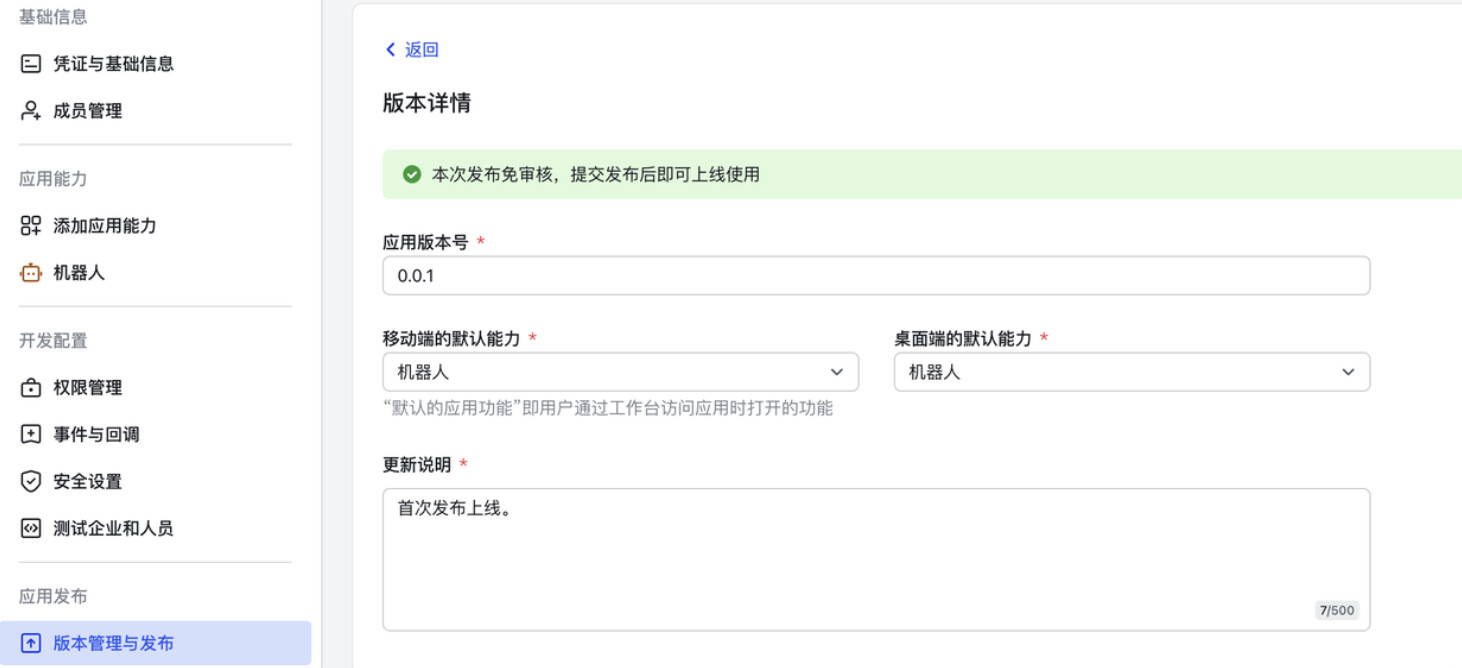
第三步:发布应用版本
权限申请完成后,应用处于"待上线"状态,点击顶部"创建版本"按钮。

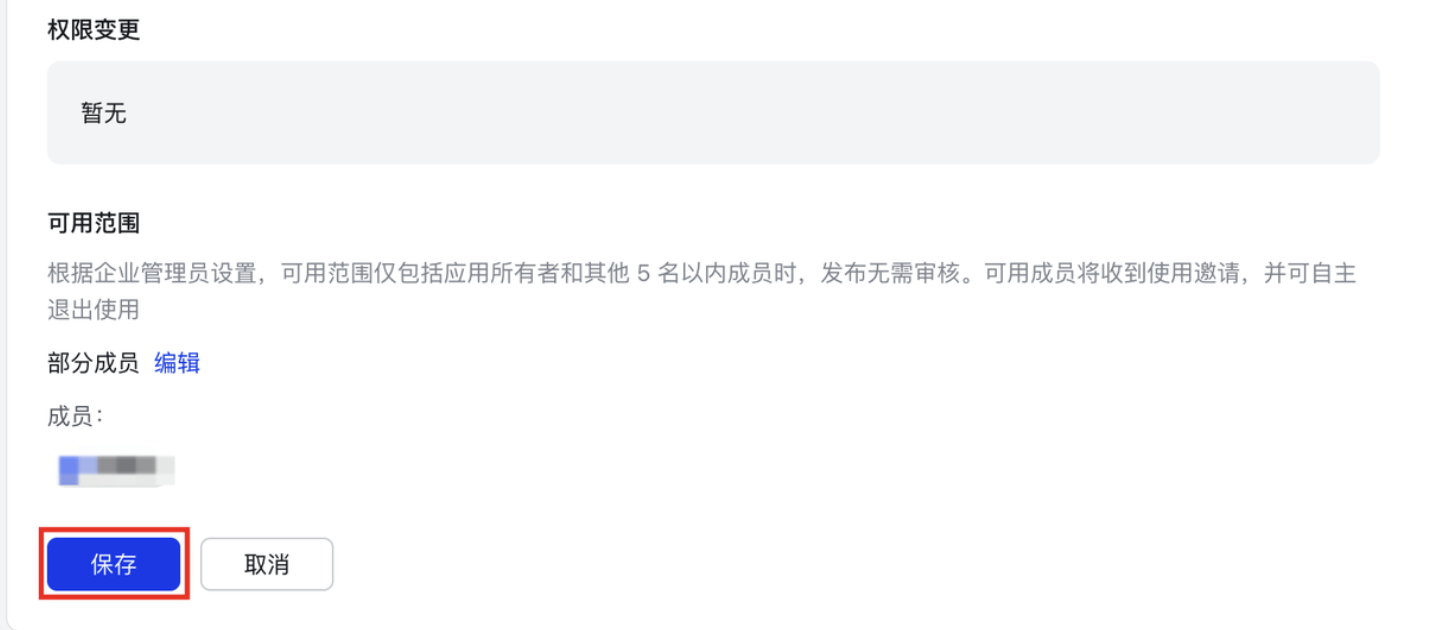
填写应用版本号和更新说明,点击"保存"。
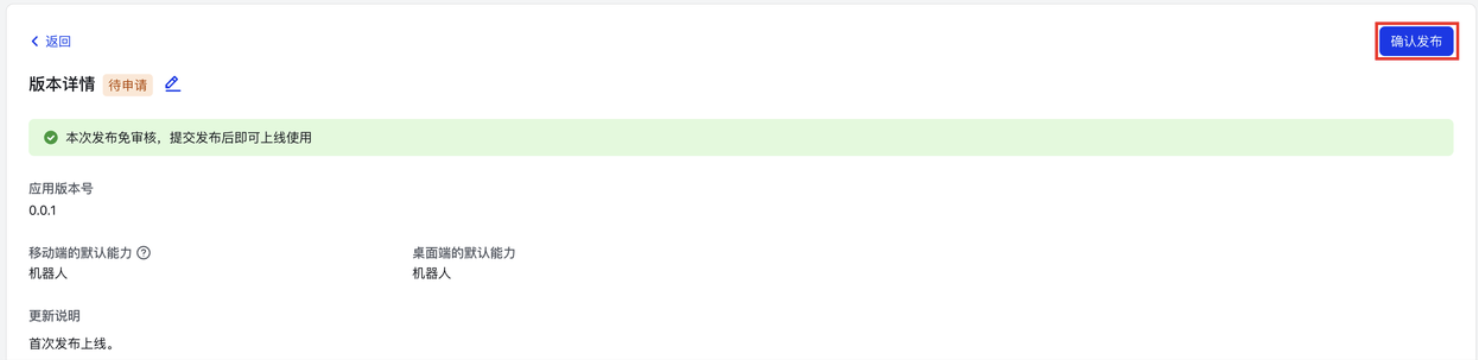
保存完成后,点击页面右上角"确认发布"按钮完成应用发布。
第四步:获取配置信息
在左侧目录树选择"基础信息 > 凭证与基础信息",记录 App ID 和 App Secret,下一步需要用到。
第五步:安装飞书插件并完成关联
确保 Gateway 已在容器中运行(见第一章第 4 步),打开新终端执行:
docker exec -it my-openclaw feishu-plugin-onboard install
按提示输入第四步获取的 App ID 和 App Secret 完成关联。
第六步:订阅机器人事件
回到飞书开放平台,进入"开发配置 > 事件与回调",配置长链接事件订阅方式,添加"接收消息"事件,并发布新版本使配置生效。
第七步:完成机器人配对
在飞书中向机器人发送任意消息,机器人会返回配对码:

在容器内执行以下命令完成配对(将 <配对码> 替换为实际收到的配对码):
docker exec -it my-openclaw openclaw pairing approve feishu <配对码> --notify

按提示完成授权后,即可正常使用。

常见问题
如何调整模型或频道配置?
docker exec -it my-openclaw openclaw configure
更多OpenClaw飞书官方插件安装细节请访问 OpenClaw飞书官方插件安装步骤。
更多 Skills 和使用技巧请访问 openclaw.ai。